- cPanel Nedir ve Neden Önemlidir?
- Başlamadan Önce: İhtiyacınız Olanlar
- Adım 1: cPanel'e Giriş Yapın
- Adım 2: WordPress Yükleyicisini Bulun
- Adım 3: WordPress Kurulumunu Başlatın
- Adım 4: Kurulum Ayarlarını Yapılandırın
- Adım 5: Bir Tema Seçin (Bu Aşamada İsteğe Bağlı)
- Adım 6: Kurulumu Tamamlayın
- Adım 7: WordPress Kontrol Panelinize Giriş Yapın
- Adım 8: WordPress'i Keşfedin ve Yapılandırın
- Adım 9: Alan Adınızı Yönlendirin (Gerekirse)
- Yaygın Sorunları Giderme
- Alternatif: WordPress'i cPanel Üzerinden Manuel Olarak Kurma
- Kurulum Sonrası Güvenlik En İyi Uygulamaları
- Siteniz Yayında Olduktan Sonra İçerik Yayınlamaya Devam Etme
- Sıkça Sorulan Sorular
- Son Düşünceler
cPanel ile WordPress nasıl kurulur merak ettiyseniz, doğru yerdesiniz. İster ilk blogunuzu başlatıyor, ister bir iş web sitesi kuruyor, ister çevrimiçi bir mağaza açıyor olun, WordPress dünyanın en popüler içerik yönetim sistemi olmaya devam ediyor ve cPanel, kurulum sürecini tamamen yeni başlayanlar için bile son derece basit hale getiriyor. Bu kapsamlı kılavuzda, cPanel'in ne olduğunu anlamaktan, tam işlevsel bir WordPress sitesiyle yayına geçmeye kadar her adımda size rehberlik edeceğiz.
cPanel Nedir ve Neden Önemlidir?
cPanel, çoğu paylaşımlı hosting şirketi tarafından sağlanan web tabanlı bir kontrol panelidir. Bunu, hosting hesabınızın kontrol paneli olarak düşünebilirsiniz. Buradan dosyaları, veritabanlarını, e-posta hesaplarını, alan adlarını, güvenlik ayarlarını ve daha fazlasını yönetebilirsiniz. cPanel'in en kullanışlı özelliklerinden biri, WordPress gibi yazılımları tek bir satır kod yazmadan dağıtmanıza olanak tanıyan tek tıklamayla uygulama yükleyicisidir.
Bluehost, Hostinger, SiteGround, A2 Hosting veya DreamHost gibi sağlayıcılardan bir hosting planı satın aldığınızda, neredeyse her zaman cPanel erişimi de dahil edilir. Arayüz, hostlar arasında biraz farklı görünebilir, ancak temel işlevsellik (WordPress yükleyicisi dahil) tutarlıdır.
Başlamadan Önce: İhtiyacınız Olanlar
cPanel ile WordPress'i yüklemeden önce aşağıdakilere sahip olduğunuzdan emin olun:
Bir alan adı. Bu, internet üzerindeki web sitenizin adresidir (örneğin, siteniz.com). Alan adını doğrudan hosting sağlayıcınızdan veya Namecheap veya GoDaddy gibi üçüncü taraf bir kayıt kuruluşundan kaydedebilir ve ardından hostunuzun ad sunucularına yönlendirebilirsiniz.
cPanel'e sahip bir hosting hesabı. Belirtildiği gibi, çoğu paylaşımlı hosting planı cPanel ile birlikte gelir. Hosting hesabınıza giriş yapın ve cPanel'in mevcut olduğunu doğrulayın.
cPanel giriş bilgileri. Hosting sağlayıcınız, kayıt olduğunuzda bunları size e-posta ile gönderecektir. Genellikle hoş geldiniz e-postanızda veya müşteri alanı kontrol panelinizde bulunurlar.
Aktif bir internet bağlantısı. Hepsi bu. Yerel makinenize yüklemeniz gereken bir yazılım yok.
Adım 1: cPanel'e Giriş Yapın
İlk adım, cPanel kontrol panelinize erişmektir.
- Tarayıcınızı açın ve cPanel giriş URL'nize gidin. Bu genellikle aşağıdaki formatlardan biridir:
http://alanadiniz.com/cpanel
http://alanadiniz.com:2082
https://alanadiniz.com:2083 (SSL bağlantıları için)
2. Kullanıcı adınızı ve şifrenizi girin. Bunlar, hosting hoş geldiniz e-postanızda sağlanmıştır.
3. Giriş Yap'a tıklayın.
İçeri girdikten sonra, Dosyalar, Veritabanları, Alan Adları, E-posta ve Yazılım gibi bölümlere ayrılmış tam cPanel kontrol panelini göreceksiniz.
Adım 2: WordPress Yükleyicisini Bulun
cPanel, uygulama dağıtımlarını basitleştirmek için tek tıklamayla yükleyici araçlarıyla entegre olur. Karşılaşacağınız en yaygın yükleyiciler Softaculous ve Installatron'dur. Bazı hostlar kendi markalı sürümlerini kullanır, ancak hepsi aynı şekilde çalışır.
Softaculous'u Bulma
1. cPanel'de, Yazılım bölümüne (bazen "Softaculous Apps Installer" olarak etiketlenir) kadar aşağı kaydırın. 2. Softaculous simgesini göreceksiniz. Üzerine tıklayın. 3. Softaculous panelinde, "En İyi Scriptler" bölümünde WordPress'i arayın veya üstteki arama çubuğunu kullanın. 4. WordPress simgesine tıklayın.Installatron'u Bulma
1. cPanel'de, Installatron Applications Installer simgesini arayın. 2. Installatron kontrol panelini açmak için üzerine tıklayın. 3. WordPress'i arayın veya göz atın ve üzerine tıklayın.Hostunuzun Özel Bir Yükleyicisi Varsa
Bazı hosting sağlayıcıları (Bluehost gibi) cPanel veya müşteri alanlarına doğrudan entegre edilmiş özel bir WordPress yükleyicisi sunar. cPanel kontrol panelinizin üst kısmında özel bir "WordPress" veya "WordPress Yükle" düğmesi arayın.
Adım 3: WordPress Kurulumunu Başlatın
Yükleyicinizde WordPress'e tıkladıktan sonra, WordPress'in bir açıklamasıyla bir genel bakış sayfası göreceksiniz. Yükle düğmesini (bazen "Şimdi Yükle" veya "Hızlı Yükle" olarak etiketlenir) arayın ve tıklayın.
Adım 4: Kurulum Ayarlarını Yapılandırın
Bu, sürecin en önemli kısmıdır. WordPress'in nasıl ve nerede yükleneceğini yapılandırdığınız bir formla karşılaşacaksınız. İşte her alanın anlamı ve ne girmeniz gerektiği:
Protokol Seçin
Siteniz için URL protokolünü seçin:
http:// — standart, şifrelenmemiş https:// — SSL ile şifrelenmiş (SSL sertifikası yüklüyse önerilir)
Hostunuz ücretsiz bir SSL sertifikası sağlıyorsa (çoğu modern host Let's Encrypt aracılığıyla sağlar), https:// seçin.
Alan Adı Seçin
Açılır menüden WordPress'i yüklemek istediğiniz alan adını seçin. Hesabınızda yalnızca bir alan adı varsa, varsayılan olarak seçilecektir.
Dizinde
Bu alan, WordPress'in alan adınızın köküne göre nerede yükleneceğini tanımlar. WordPress'i alanadiniz.com adresinde istiyorsanız boş bırakın. alanadiniz.com/blog gibi bir alt dizinde istiyorsanız, buraya blog yazın.
Çoğu kullanıcı için birincil bir web sitesi oluştururken, bu alanı boş bırakın.
Site Adı
Web sitenizin adını girin. Bu, tarayıcı sekmenizde ve WordPress sitenizin üst kısmında görünür. Bunu daha sonra WordPress içinde değiştirebilirsiniz, bu yüzden üzerinde fazla durmayın.
Site Açıklaması
Siteniz için kısa bir slogan veya açıklama ekleyin. Yine, daha sonra kolayca değiştirilebilir.
Çoklu Siteyi Etkinleştir (WPMU)
Tek bir kurulum altında bir WordPress sitesi ağı çalıştırmak istemediğiniz sürece bunu işaretlemeyin (ileri düzey bir özellik).
Yönetici Kullanıcı Adı
WordPress yönetici hesabınız için bir kullanıcı adı seçin. "admin" kullanmayın, bu hackerların denediği ilk şeydir. Benzersiz bir şey seçin.
Yönetici Şifresi
Güçlü bir şifre oluşturun. Büyük harfler, küçük harfler, sayılar ve özel karakterlerin bir karışımını kullanın. Yükleyici genellikle bir güç ölçer sağlar. "Güçlü" veya "Çok Güçlü" hedefleyin.
Yönetici E-postası
Geçerli bir e-posta adresi girin. WordPress, şifre sıfırlama bağlantılarını ve bildirimleri buraya gönderecektir. Erişiminiz olan bir adres olduğundan emin olun.
Dil Seçin
WordPress arayüzü için tercih ettiğiniz dili seçin.
Eklentileri Seçin (İsteğe Bağlı)
Bazı yükleyiciler, önceden yaygın eklentileri yüklemeyi teklif eder, örneğin bir önbellek eklentisi, güvenlik eklentisi veya iletişim formu. Bunları şimdilik atlayabilir ve eklentileri daha sonra manuel olarak yükleyebilirsiniz.
Gelişmiş Seçenekler (İsteğe Bağlı)
"Gelişmiş Seçenekler" bölümünde şunları bulabilirsiniz:
Veritabanı Adı: Otomatik olarak oluşturulur, ancak özelleştirebilirsiniz. Tablo Ön Eki: Varsayılan olarak wp_. Bunu benzersiz bir şeyle değiştirmek (örneğin x7k_) bir güvenlik katmanı ekler. Otomatik Güncelleme: WordPress'i otomatik olarak güncel tutmak için etkinleştirin. Eklentileri/Temaları Otomatik Güncelle: Güvenlik için isteğe bağlı, ancak önerilir. Otomatik Yedeklemeler: Sunuluyorsa bir yedekleme programı ayarlayın.
Adım 5: Bir Tema Seçin (Bu Aşamada İsteğe Bağlı)
Bazı yükleyiciler, son kurulumdan önce bir tema seçim ekranı gösterir. Burada ücretsiz bir tema seçebilir veya bu adımı atlayabilirsiniz — WordPress, varsayılan temalarla önceden yüklü gelir ve temayı istediğiniz zaman WordPress kontrol panelinden değiştirebilirsiniz.
Adım 6: Kurulumu Tamamlayın
Tüm ayarlarınızı yapılandırdıktan sonra, aşağı kaydırın ve Yükle düğmesine tıklayın.
Yükleyici şunları yapacaktır:
- Otomatik olarak bir MySQL veritabanı oluşturur
- WordPress dosyalarını indirir ve yapılandırır
- Yönetici hesabınızı kurar
- Her şeyi birbirine bağlar
Bu işlem 30 saniyeden 2 dakikaya kadar sürebilir. Tamamlandığında, şu bağlantılarla bir başarı ekranı göreceksiniz:
Web sitenizin URL'si — ziyaretçilerin gördüğü
WordPress yönetici URL'si — genellikle alanadiniz.com/wp-admin
Bu URL'leri kaydedin! Yönetici URL'nizi yer imlerine ekleyin, böylece gelecekte kontrol paneline kolayca erişebilirsiniz.
Adım 7: WordPress Kontrol Panelinize Giriş Yapın
1. `alanadiniz.com/wp-admin` adresine gidin 2. Kurulum sırasında belirlediğiniz yönetici kullanıcı adı ve şifresini girin 3. Giriş Yap'a tıklayınArtık web sitenizin kontrol merkezi olan WordPress yönetici kontrol panelindesiniz.
Adım 8: WordPress'i Keşfedin ve Yapılandırın
Giriş yaptıktan sonra, temel ayarları yapmak için birkaç dakika ayırın:
Kalıcı Bağlantı Yapınızı Ayarlayın
Ayarlar → Kalıcı Bağlantılar'a gidin ve bir URL yapısı seçin. "Yazı ismi" seçeneği (alanadiniz.com/ornek-yazi/) en SEO dostu olanıdır. Değişiklikleri Kaydet'e tıklayın.
Genel Ayarları Yapılandırın
Ayarlar → Genel'e gidin ve site başlığınızı, sloganınızı, zaman diliminizi ve tarih formatınızı doğrulayın.
Bir Tema Yükleyin
Görünüm → Temalar → Yeni Ekle'ye giderek binlerce ücretsiz WordPress temasına göz atın. Popüler başlangıç dostu seçenekler arasında Astra, Kadence ve Hello Elementor bulunur.
Gerekli Eklentileri Yükleyin
Eklentiler → Yeni Ekle'ye gidin ve ihtiyaçlarınıza uygun eklentileri arayın. Dikkate alınması gereken bazı temel eklentiler:
Yoast SEO veya Rank Math — arama motoru optimizasyonu için Wordfence veya Solid Security — güvenlik için UpdraftPlus — otomatik yedeklemeler için WP Super Cache veya W3 Total Cache — performans için
İlk Sayfanızı veya Yazınızı Oluşturun
Sayfalar → Yeni Ekle'ye giderek statik sayfalar oluşturun (örneğin "Hakkında" veya "İletişim"), veya Yazılar → Yeni Ekle'ye giderek ilk blog makalenizi yazın.
Adım 9: Alan Adınızı Yönlendirin (Gerekirse)
Alan adınızı üçüncü taraf bir kayıt kuruluşundan (hostunuzdan ayrı) kaydettiyseniz, ad sunucularınızı güncelleyerek hosting sunucunuza yönlendirmeniz gerekecektir. Hostunuz size ad sunucu adresleri sağlayacaktır (örneğin, ns1.hostunuz.com ve ns2.hostunuz.com). Alan adı kayıt kuruluşunuza giriş yapın, ad sunucu ayarlarını bulun ve mevcut olanları hostunuzun ad sunucuları ile değiştirin. DNS yayılımı 48 saate kadar sürebilir, ancak genellikle birkaç saat içinde tamamlanır.
Yaygın Sorunları Giderme
Sorunsuz bir süreçle bile, birkaç aksaklıkla karşılaşabilirsiniz. İşte en yaygın sorunlar ve nasıl çözülecekleri:
"Veritabanı Bağlantısı Kurulurken Hata"
Bu genellikle veritabanı kimlik bilgilerinin yanlış olduğu veya veritabanının düzgün oluşturulmadığı anlamına gelir. Softaculous/Installatron'a geri dönün, başarısız yüklemeyi silin ve tekrar deneyin. Veritabanı adının zaten mevcut olmadığından emin olun.
WordPress Boş Beyaz Ekran Gösteriyor
Bu genellikle "Beyaz Ölüm Ekranı" olarak adlandırılır. Genellikle bir eklenti veya tema çatışmasından kaynaklanır. /wp-admin adresine erişmeyi deneyin ve yakın zamanda eklenen eklentileri devre dışı bırakın. Kontrol paneline erişemiyorsanız, cPanel'in Dosya Yöneticisini kullanarak eklentiler klasörünün adını değiştirin (/public_html/wp-content/plugins/ → /public_html/wp-content/plugins-disabled/).
WordPress Yöneticiye Giriş Yapılamıyor
Kimlik bilgilerinizi iki kez kontrol edin. Şifrenizi unuttuysanız, giriş sayfasındaki "Şifrenizi mi unuttunuz?" bağlantısını kullanın. Alternatif olarak, cPanel'in phpMyAdmin aracı aracılığıyla wp_users tablosunu düzenleyerek doğrudan sıfırlayabilirsiniz.
Sayfalarda 404 Hatası
WordPress kontrol panelinizde Ayarlar → Kalıcı Bağlantılar'a gidin ve hiçbir şeyi değiştirmeden Değişiklikleri Kaydet'e tıklayın. Bu, .htaccess yeniden yazma kurallarını temizler ve genellikle 404 hatalarını çözer.
Kurulum Kök Dizin Yerine Alt Dizinine Gidiyor
Siteniz alanadiniz.com/wp veya benzeri bir alt dizinde yükleniyorsa, kurulum sırasında "Dizinde" alanına yanlışlıkla bir dizin adı girdiğiniz anlamına gelir. Ya doğru konuma yeniden yüklemeniz ya da WordPress dosyalarını Dosya Yöneticisi aracılığıyla kök dizine manuel olarak taşımanız gerekecektir.
Alternatif: WordPress'i cPanel Üzerinden Manuel Olarak Kurma
Hosting planınız Softaculous veya Installatron içermiyorsa (veya daha fazla kontrol tercih ediyorsanız), WordPress'i manuel olarak yükleyebilirsiniz. İşte nasıl:
Adım 1: WordPress'i İndirin
wordpress.org/download adresine gidin ve WordPress'in en son sürümünü .zip dosyası olarak indirin.
Adım 2: cPanel Dosya Yöneticisi Üzerinden Yükleyin
cPanel'de, Dosya Yöneticisini açın ve web sitenizin kök dizinine (genellikle public_html) gidin. Yükle'ye tıklayın ve WordPress .zip dosyasını yükleyin. Yüklendikten sonra dosyayı seçin ve çıkartmak için Çıkart'a tıklayın. Tüm dosyaları çıkarılan wordpress klasöründen public_html'e (veya istediğiniz alt dizine) taşıyın.
Adım 3: Bir MySQL Veritabanı Oluşturun
cPanel'de, MySQL Veritabanlarına gidin:
- Yeni bir veritabanı oluşturun (örneğin, youruser_wpdb)
- Güçlü bir şifre ile yeni bir veritabanı kullanıcısı oluşturun (örneğin, youruser_wpuser)
- Kullanıcıyı veritabanına ekleyin ve Tüm Ayrıcalıkları verin
Veritabanı adını, kullanıcı adını ve şifreyi not alın, bir sonraki adımda bunlara ihtiyacınız olacak.
Adım 4: WordPress Kurulum Sihirbazını Çalıştırın
Tarayıcınızda alan adınızı ziyaret edin. WordPress, henüz yapılandırılmadığını algılayacak ve kurulum sihirbazını başlatacaktır. "Hadi Başlayalım!" tıklayın, veritabanı kimlik bilgilerinizi girin ve kurulumu tamamlayın.
Kurulum Sonrası Güvenlik En İyi Uygulamaları
WordPress yüklendikten sonra, güvenliğini sağlamak için şu adımları izleyin:
- Yönetici hesabınız için güçlü, benzersiz bir şifre kullanın ve bir şifre yöneticisinde saklayın.
- Brute-force saldırı riskini azaltmak için WPS Hide Login gibi bir eklenti kullanarak varsayılan giriş URL'sini değiştirin.
- Wordfence veya Solid Security gibi bir güvenlik eklentisi yükleyin.
- WordPress, temalar ve eklentileri her zaman güncel tutun. Güncellenmemiş yazılımlar, WordPress saldırılarının bir numaralı nedenidir.
- Henüz yapmadıysanız SSL kurun. cPanel'de Let's Encrypt SSL veya AutoSSL arayın ve alan adınız için bir sertifika yükleyin.
- UpdraftPlus veya hostunuzun yerleşik yedekleme sistemi aracılığıyla düzenli yedeklemeler oluşturun.
- Başarısız giriş denemelerini engellemek için giriş denemelerini sınırlayın.
- Kullanılmayan temaları ve eklentileri kaldırın. Kullanılmayan yazılımlar hala istismar edilebilir.
Siteniz Yayında Olduktan Sonra İçerik Yayınlamaya Devam Etme
WordPress'i kurmak sadece başlangıçtır. Siteniz yayına girdikten sonra gerçek iş başlar: trafik çeken ve gelir üreten yüksek kaliteli, SEO optimize edilmiş içerik yayınlamak. Birçok web sitesi sahibi için bu, işlerin yavaşladığı yerdir. İyi araştırılmış tek bir makale yazmak dört ila sekiz saat sürebilir ve SEO başarısı genellikle ayda sekiz ila on iki yazı yayınlamayı gerektirir.
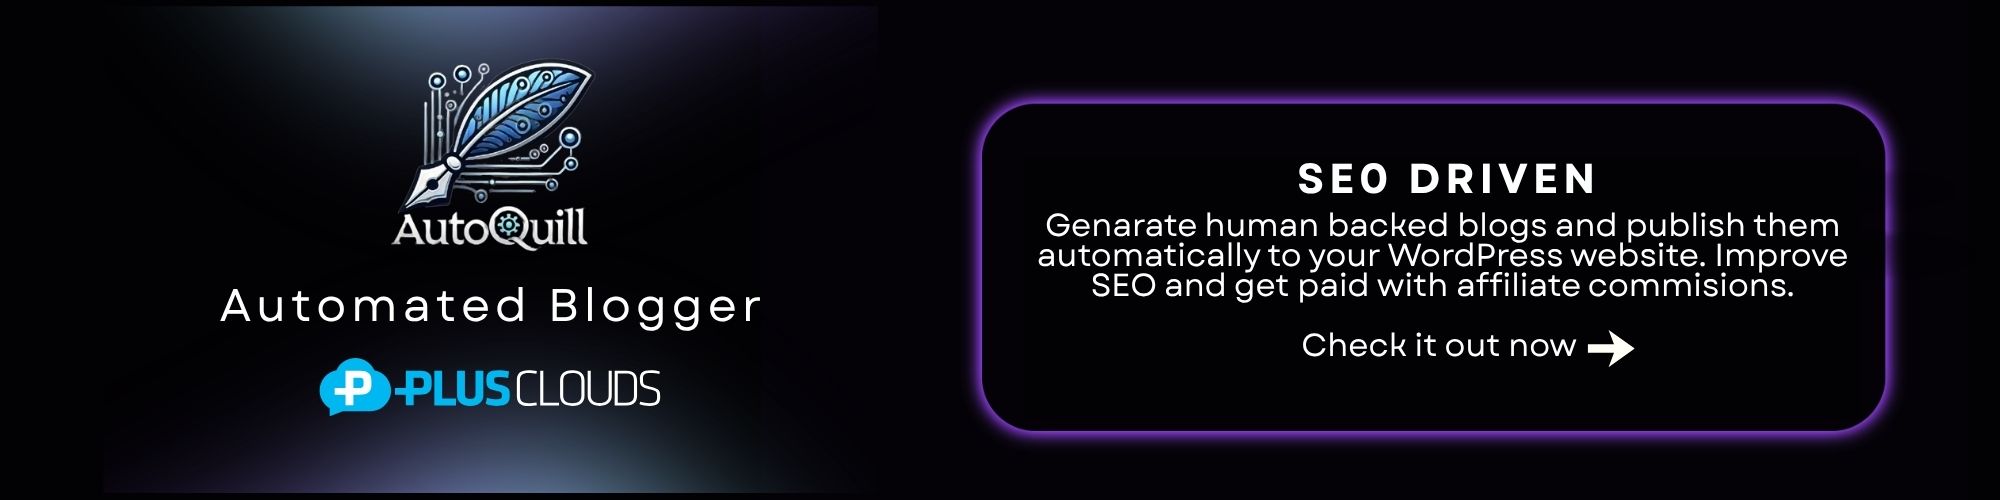
İşte burada PlusClouds tarafından geliştirilen AutoQuill devreye giriyor.
AutoQuill, içeriği sadece saniyeler içinde yazan, biçimlendiren ve yayınlayan, geleneksel içerik ajanslarının maliyetinin bir kısmına sahip AI destekli bir SEO yayınlama aracıdır.
AutoQuill iş akışının WordPress destekli bir siteye nasıl uyduğunu buradan görebilirsiniz.
1. Kanıtlanmış içeriği seçin. İnsanlar tarafından yazılmış, yüksek performanslı makaleler havuzundan seçim yapın. Beyin fırtınası yok, boş sayfa sorunu yok.
2. AI yeniden yazma. AutoQuill'in özel eğitilmiş AI'sı, temel bilgileri çıkarır ve parçayı tamamen farklı bir ifadeyle ve cümle yapısıyla yeniden yazar, markanızın sesi ve hedef kitleniz için özelleştirir. Metnin tonunu seçebilirsiniz.
3. Tek tıklamayla yayınlama. İçerik biçimlendirilir ve otomatik olarak WordPress sitenize canlı olarak gönderilir. Kopyala-yapıştır yok, biçimlendirme sorunları yok.
4. Para kazanma. Her makaleye otomatik olarak bağlı ortaklık bağlantılarınız eklenir, böylece yayınlanan her makale pasif bir gelir fırsatına dönüşür.
Bağlı ortaklık bağlantılarından çıkmak isterseniz Pro Sürümünü satın alabilirsiniz. Fiyatlandırma, tam marka izolasyonu, bağlantı özerkliği ve isteğe bağlı bağlı ortaklık ortaklığı içeren Pro Sürümü için ayda 7,99 dolardan başlar, kredi kartı gerektirmeyen Ücretsiz Sürüm mevcuttur.
WordPress'i yeni kurduysanız ve sıralama yapan içerikle hızlı bir başlangıç yapmak istiyorsanız, AutoQuill'i keşfetmeye değer. Daha fazla bilgi edinebilir ve sorularınızı topluluk sayfamızda sorabilirsiniz!
Community
Further questions? Ask our team
Sıkça Sorulan Sorular
cPanel ile WordPress yüklemek ücretsiz mi? WordPress yazılımı kendisi ücretsiz ve açık kaynaklıdır. Hosting (cPanel erişimi dahil) ve bir alan adı için ödeme yapmanız gerekecek, ancak WordPress'i indirmek veya kullanmak için hiçbir maliyet yoktur.
Kurulum ne kadar sürer? Softaculous veya Installatron kullanarak, tüm süreç (cPanel'e giriş yapmaktan canlı bir WordPress sitesine sahip olmaya kadar) genellikle 5 ila 10 dakika sürer.
WordPress'i bir alt alana yükleyebilir miyim? Evet. cPanel'de, önce Alan Adları → Alt Alan Adları altında bir alt alan oluşturun (örneğin, blog.alanadiniz.com), ardından WordPress yükleyicisini çalıştırın ve hedef olarak bu alt alanı seçin.
Bir cPanel hesabında birden fazla WordPress kurulumu yapabilir miyim? Evet. Hosting planınızın sınırlarına bağlı olarak, aynı cPanel hesabında farklı alan adları veya alt alanlar altında WordPress'i birden fazla kez yükleyebilirsiniz.
WordPress.com ve WordPress.org arasındaki fark nedir? WordPress.org, cPanel üzerinden yüklediğiniz kendi kendine barındırılan sürümdür. Sitenizin tamamen sahibisiniz ve herhangi bir tema veya eklenti yükleyebilirsiniz. WordPress.com, ücretsiz planlarda daha fazla kısıtlama olan barındırılan bir hizmettir. Tam kontrol için, her zaman kendi hostinginiz aracılığıyla WordPress.org'u tercih edin.
Kodlama bilmem gerekiyor mu? Hiç gerek yok. cPanel üzerinden WordPress yüklemek sıfır kodlama bilgisi gerektirir. Tüm süreç tıklama ve seçimden ibarettir.
Son Düşünceler
cPanel ile WordPress yüklemek, profesyonel bir web sitesini hızlı bir şekilde çevrimiçi hale getirmenin en erişilebilir yollarından biridir. Softaculous ve Installatron gibi tek tıklamayla yükleyiciler sayesinde, bir zamanlar geliştirici uzmanlığı gerektiren şeyler, artık herkes tarafından on dakikadan kısa sürede yapılabilir. Siteniz yayına girdikten sonra, sınır gökyüzüdür. WordPress'in devasa tema, eklenti ve entegrasyon ekosistemi sayesinde hayal edebileceğiniz her türlü web sitesini oluşturabilirsiniz.
Hatırlanması gereken ana adımlar: cPanel'e giriş yapın, yükleyicinizi bulun, WordPress ayarlarınızı yapılandırın, kurulumu tamamlayın ve ardından yeni sitenizi güvenli hale getirin ve yapılandırın. Buradan, değerli içerik oluşturmaya, arama motorları için optimize etmeye ve kitlenizi büyütmeye odaklanın.
Ve içerik yayınlamaya ayak uydurmak bunaltıcı geliyorsa, PlusClouds tarafından geliştirilen AutoQuill gibi araçlar tam da bu yükü üstlenmek için var, böylece strateji ve büyümeye odaklanırken AI yazma ve yayınlama işini halleder.
WordPress yolculuğunuz tek bir kurulumla başlar. Şimdi harika bir şeyler inşa edin.