What is NAS?
NAS stands for Network Attached Storage, referring to networked storage. It can also be described as a sort of personal cloud storage service for your devices.
What is TrueNAS?
TrueNAS is an operating system based on Linux and BSD designed for NAS systems that uses the OpenZFS file system, developed by iXsystems.
The TrueNAS series includes free public versions (known as TrueNAS CORE, previously FreeNAS), commercial versions (TrueNAS Enterprise), and Linux versions (TrueNAS SCALE, under development as of January 2021). It also offers hardware support for small home systems to large 10 petabyte arrays based on the versions mentioned above.
TrueNAS supports various virtualization hosts like XenServer and VMware, along with Windows, macOS, and Unix clients, utilizing protocols like SMB, AFP, NFS, iSCSI, SSH, rsync, and FTP/TFTP. Advanced features of TrueNAS include full disk encryption and a plugin architecture for third-party software.
TrueNAS Minimum System Requirements
• 2-core 64-bit processor
* 8 GB RAM
* 2 storage devices of the same size
* At least 1 disk with a minimum of 20 GB for system operation
How to Configure TrueNAS?
To use our NAS, we need to configure the disks we will use and set up the sharing settings. Let's go through these steps one by one.
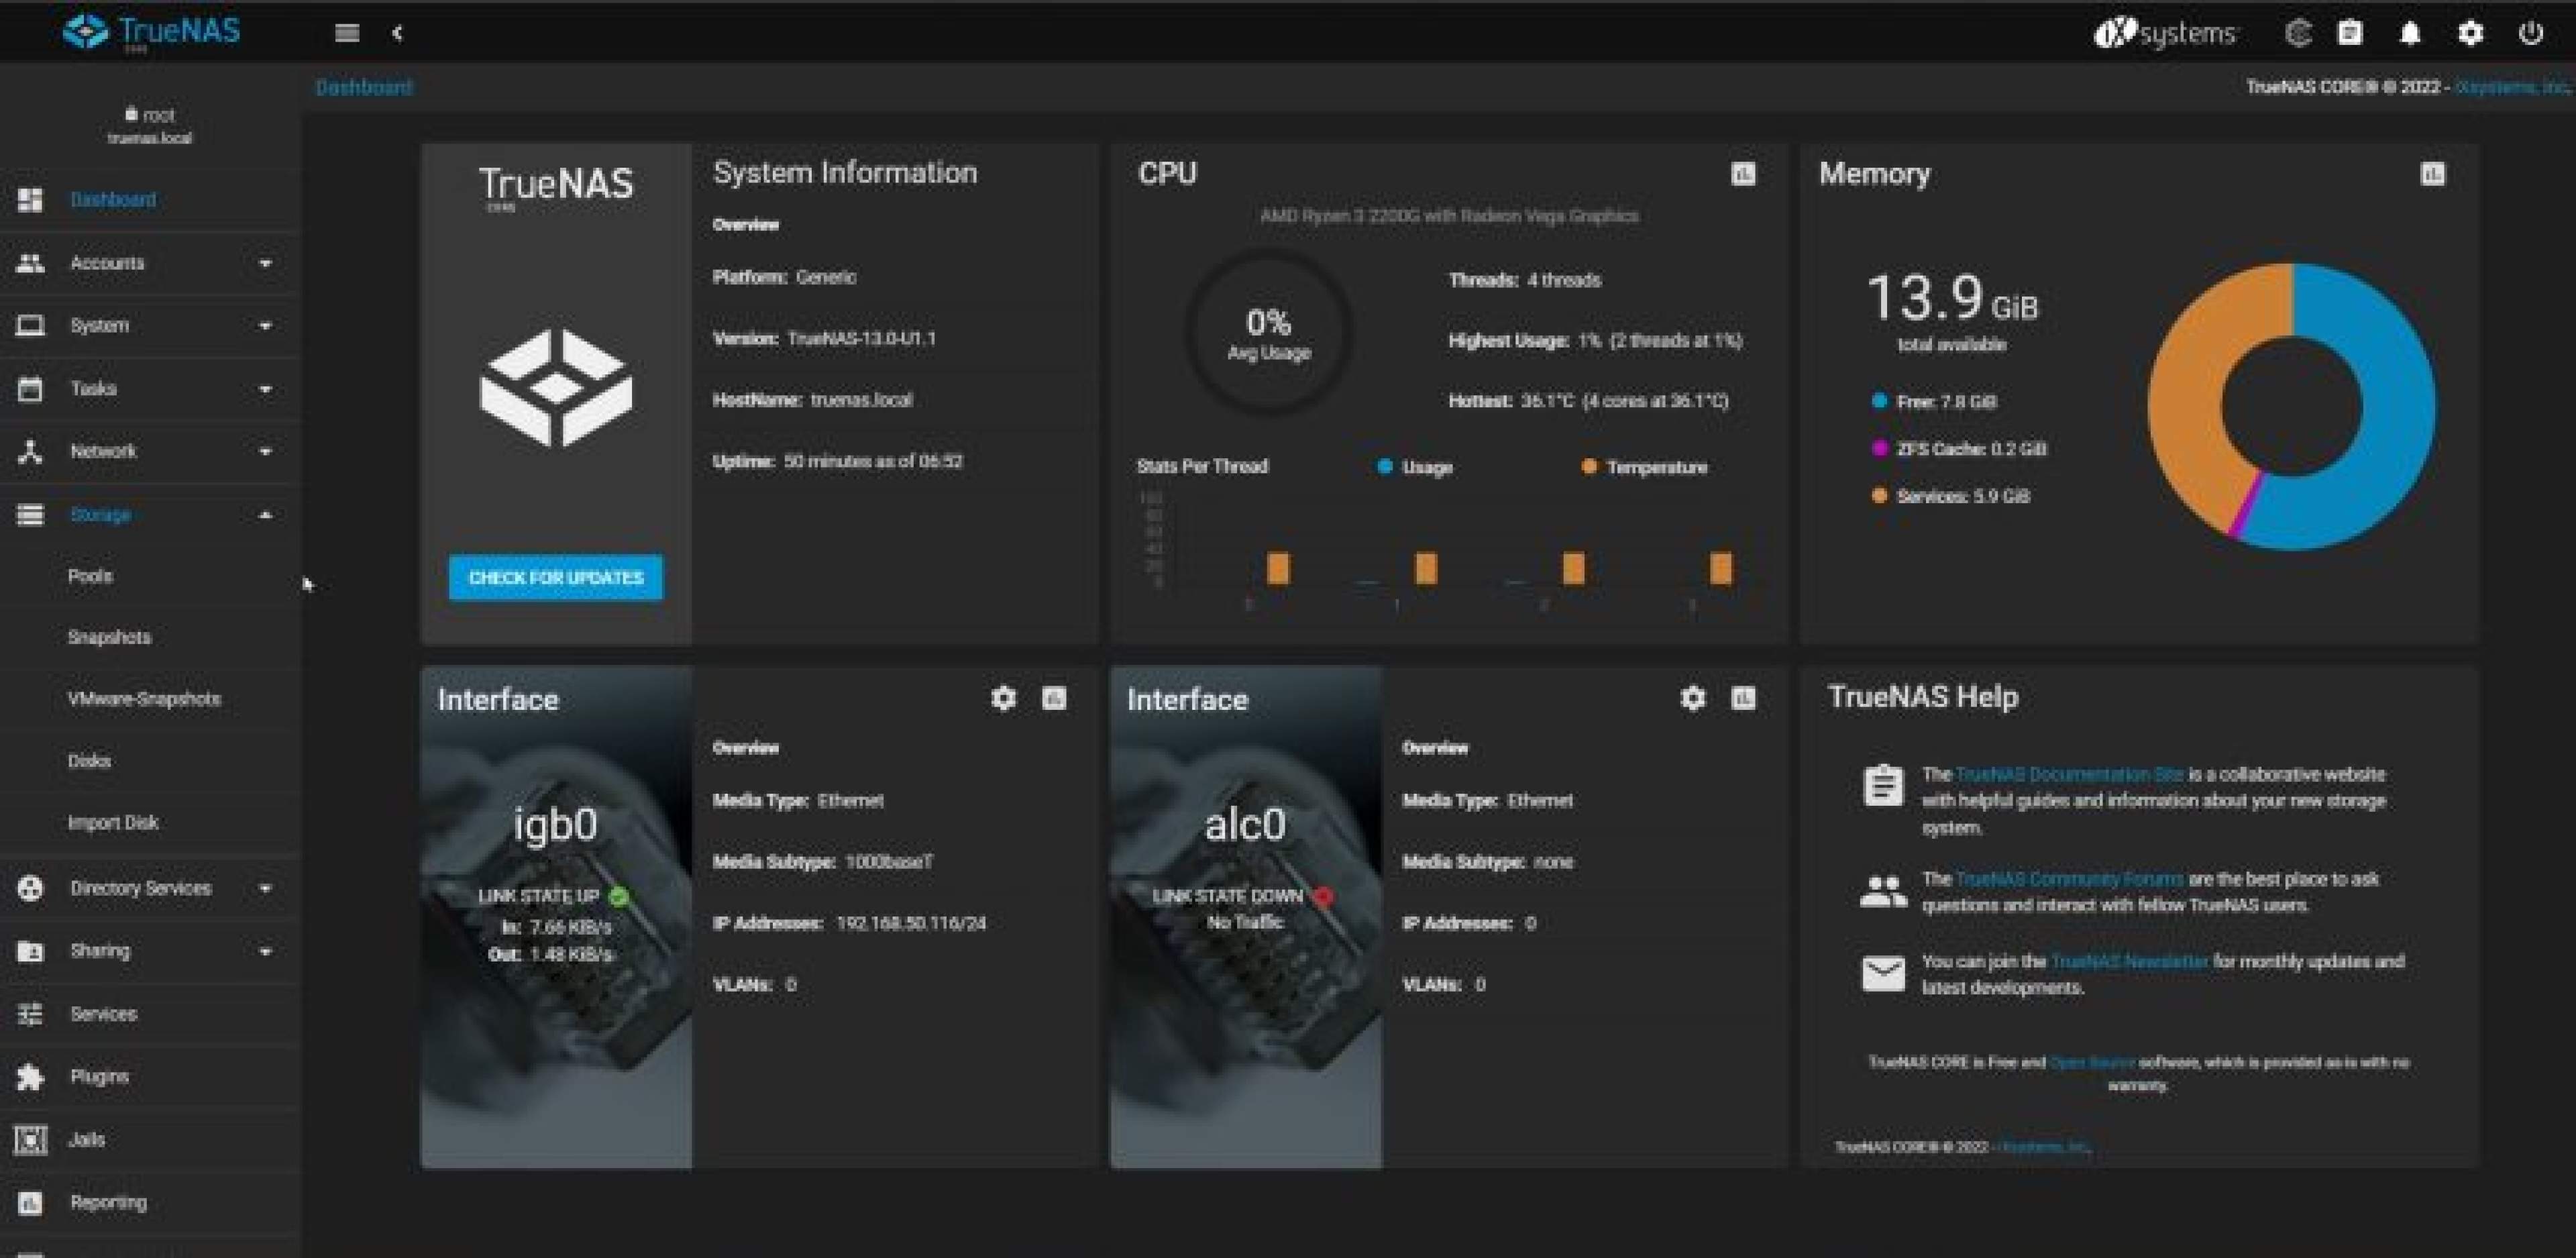
• When TrueNAS starts and you have connected the system to the network, you will see the IP address on the console screen.
You can enter this IP address into the address bar of your browser from another device on the network and hit Enter.
* A simple login screen will appear. Enter 'root' in the username field and the password we set as '123654Aa' in the password field.

We go to the Pools section under the Storage tab. We will create a pool with the disks we will use.
* We select the Add Pool option from the top right and indicate that we want to create a new pool with the Create new pool option. Then we press the Create Pool button to proceed.
* The capacities and types of the disks are listed, but we first need to give our pool a name. For example, you can name it HDD.
* The Suggest Layout option shows us the proposed configuration. Of course, if you wish, you can select the check mark next to the disks and add them manually with the right arrow button.
* You can create a pool with HDDs using the suggested layout.
* In the ADD VDEV section, there are options you can use for different purposes. For example, if you have a fast SSD, you can use it for caching.
* Now, another point to pay attention to will be the type of disk aggregation.
* The mirror option comes as the default. This option writes the same data to both disks, ensuring that your data is safe even if one fails. Of course, as you can guess, this is not a method to increase capacity.
* If you want to increase your capacity, you can choose the Strip option, but here's a little information: if one of the disks fails, you may lose your data!
* If you accept this risk, you can check the Force box at the bottom left and create the pool by clicking Create.
* The system feels the need to remind you of the change you made. If you approve, select the Confirm box and press Continue, then press Create again.
* This time, a window appears informing you that all data on the selected disks will be deleted. Check the Confirm box and click Create Pool.

Yes, our pool has been created. Now it's time to create the Dataset we will use. In the Pools screen, we select Add Dataset from the menu on the right of the pool we just created. This will be the dataset you will access. We just need to provide a name. If you wish, you can disable compression or enable encryption.

Now we need to create an account to use for access.
* You can also access through the root account, but since the root account has full authority over everything in the system, it should not be shared with other users.
* We open the Accounts tab and go to the Users section, close the pop-up window with Close. Click ADD from the top right and enter the user information. Fields marked with an asterisk must be filled.
* In the Directions and Permissions section, we select the pool or folder we want to grant access to. Below it are the read, write, and execute permissions in order. By default, all three are selected. You can remove the write permission, allowing only read operations in that pool.
* Finally, if you will access using a Microsoft account, check the Microsoft Account box on the right.
* If everything is complete, click SUBMIT and our user is created.

• Finally, we set the sharing type.
* Again, we come to the Sharing section from the menu. SMB is available for Windows and the Apple ecosystem from 2013 onwards. In this context, select the Windows Shares (SMB) option and click ADD from the top right.
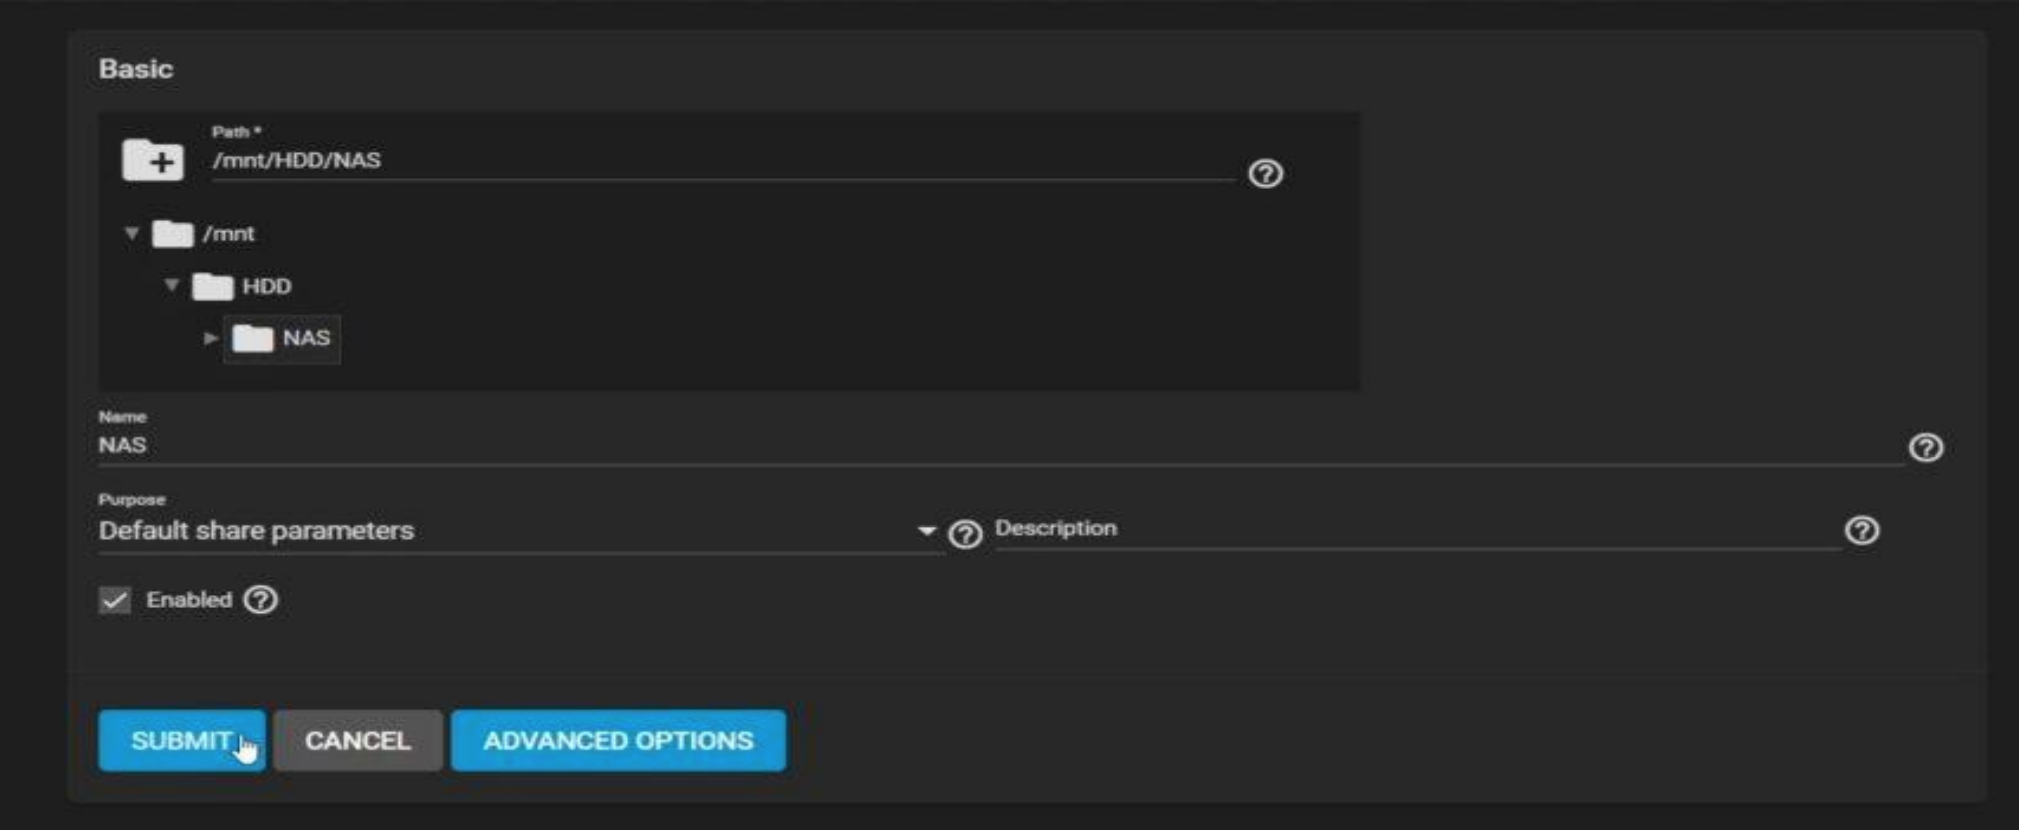
* Expand the folder marked /mnt. Expand the pool and click on the Dataset we created earlier, and click Submit. There are a few different options in the Advanced Options section, but they are not useful features for normal use.
• After clicking Submit, we need to set permissions and users for the Dataset we shared. We go to the relevant page using the Configure Now option.
* The Create an ACL (Access Control List) window greets us. Since we want to give restricted access, we select the RESTRICTED option from the Default ACL Options section.
* Now we select the user we want to grant access to from the User section. You can see the last created user at the bottom. We perform the same operation in the Group section and check the Apply User – Apply Group boxes.
* Click Save and now we are ready for access.

How to Access TrueNAS from Windows?
• We open File Explorer and click on the Network tab in the left navigation pane.
* If network discovery is off, a warning window appears informing us of this. We click OK, and then a warning appears above stating that we can change the network discovery setting.
* We click on this warning and select the option “Turn on network discovery and file sharing”.
Select the option to make the connected network private.
Tip: You can also change this setting from the "Advanced sharing settings" section in Windows settings.
* Then, we right-click on the Network tab in the left navigation pane and select “Map network drive”.

• Let's choose a letter for the drive. Z looks nice.
* In the Folder section, we need to write the path of the shared folder, but you can also make a selection using the Browse option.
* We wait for TrueNAS to appear in the list and expand it once it does. The name of the shared Dataset appears. Click it and click OK.
* Check the option to connect using different credentials and click Finish.
* Then, it asks us for our username and password. Enter the username and password we created in TrueNAS and for accessing the Dataset.
Click OK.
* You can save the login credentials if you wish.
Note: It may ask you to enter multiple passwords, and you can.

Finally, the connection has been established, and we can see our NAS drive with its capacity.

File transfer speed may vary depending on your router, the speed of your ethernet ports, network congestion, and file type. A speed of approximately 115 MB/s can be achieved with a 1 Gbps connection.